Usage
Unless you are familiar with OpenCTI, you should read the introduction to OpenCTI first.
This chapter assumes that you have
Installed the connector and set up users and tokens
Configured the connector
(A populated Wazuh database, either with real [1] or simulated data, if you intend test the setup as you read along)
In order to use the connector, you need to call it through OpenCTI’s enrichment action. This is an operation that can be performed on all observables, as well as some other entities, like vulnerabilities.
First of all, how you use the connector depends on how you have set it up to trigger. See when to run. In most cases, you would want the connector to run automatically, either on all data, or on filtered data, using playbooks. You can always run the connector manually by pressing the enrich button:

Observable with enrich button highlighted
For SDOs, the enrich button is typically a bit more hidden:
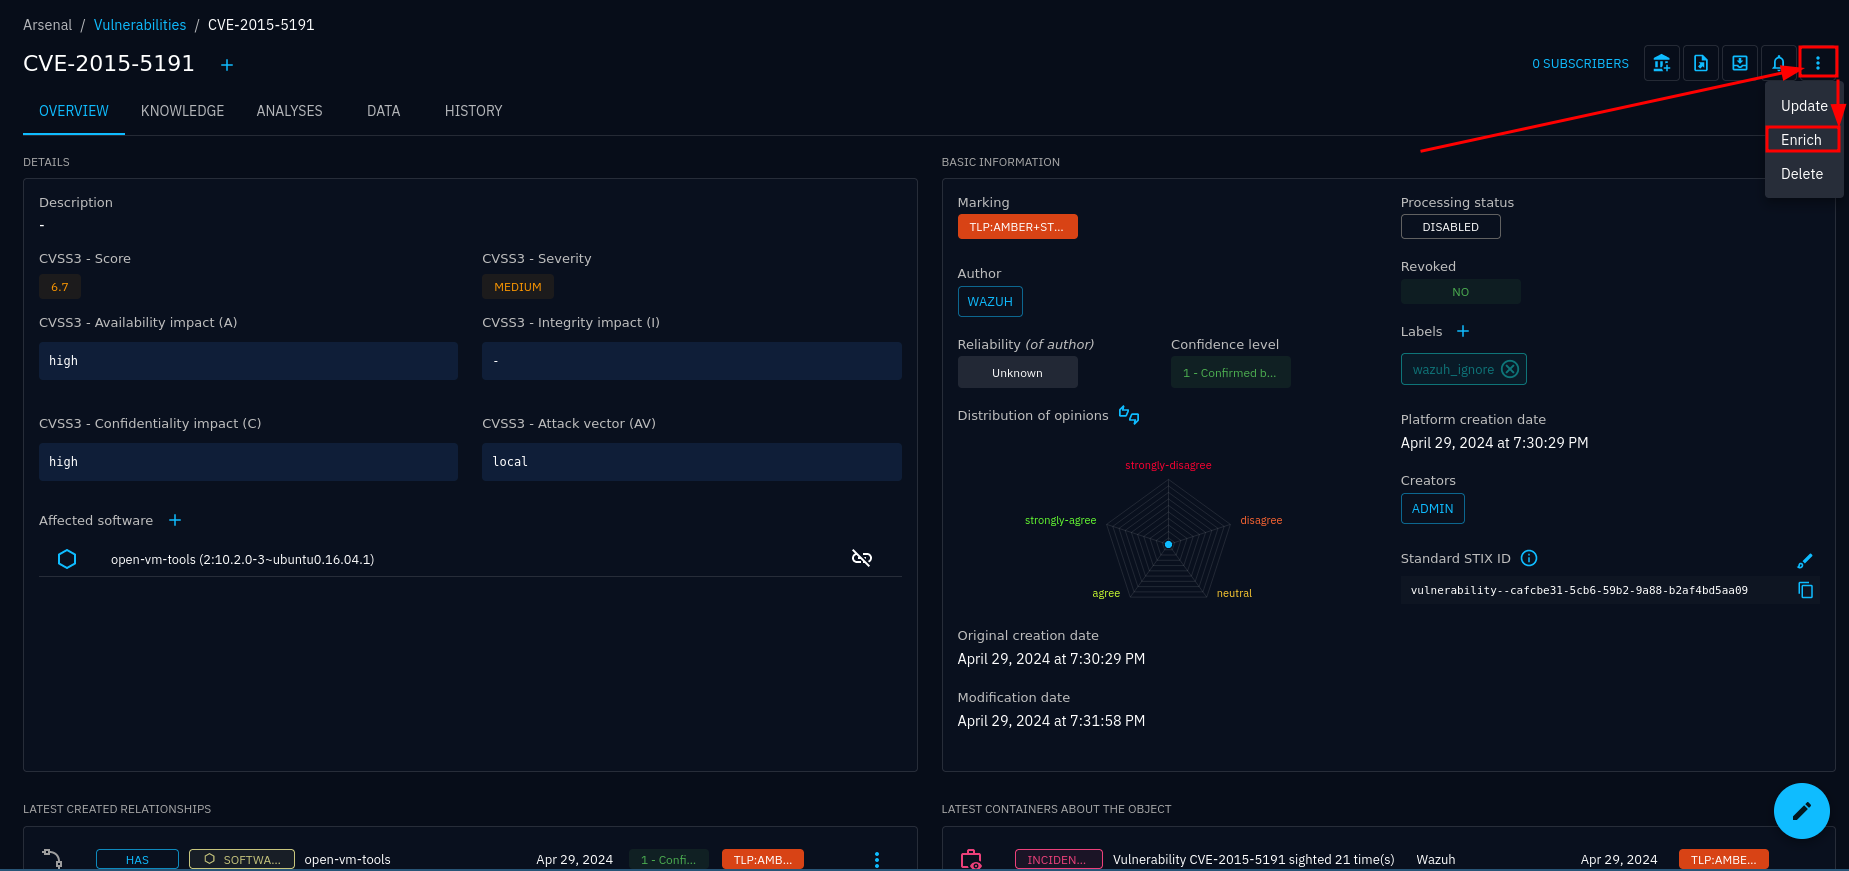
Vulnerability with enrichment button hidden under the “kebab” menu
Note
The connector will only show up as an enrichment option if CONNECTOR_SCOPE includes the entity in question.
When the enrich button is clicked, the connector will start searching for the entity in Wazuh.
Aborted searches or no hits
If the connector returns no results, but completes with a green status, the explanation is simply that there are not hits. If you expected results, please have a look at the troubleshooting section.
If the enrichment resulted in a red status icon, something failed. Common causes are:
Network issues
Authentication issues (is the
search.usernameandsearch.passwordcorrect, and does the user have the correct permissions?)The query fails because there are too many hits
See the troubleshooting section for details.
Notes and references
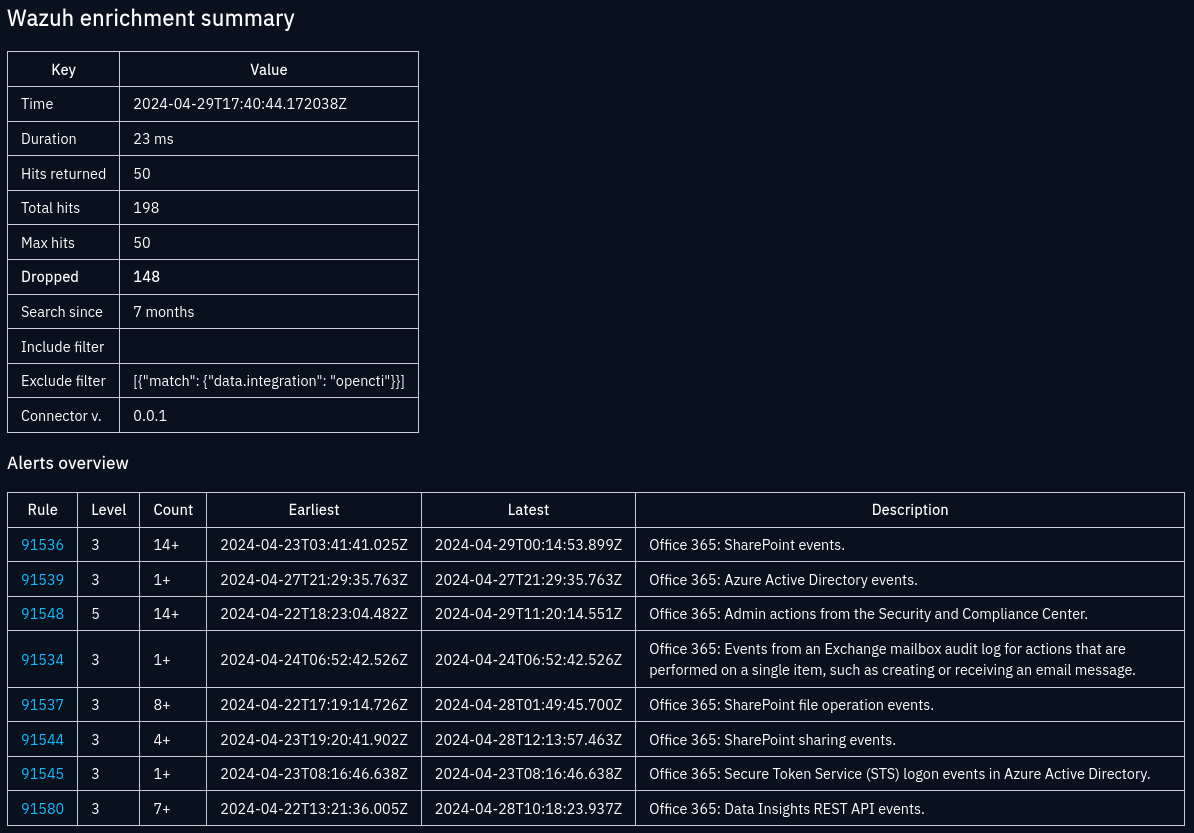
Enrichment summary note for a User-Account observable
As long as create_sighting_summary is enabled, a
note will be created and attached
to the observable and each sighting. This summary gives you details about the
search results and matched alerts, along with how the results were possibly
limited. See example summary note for details.
In addition, a note will be created for every matched alert, limited by two settings in order to avoid too many notes:
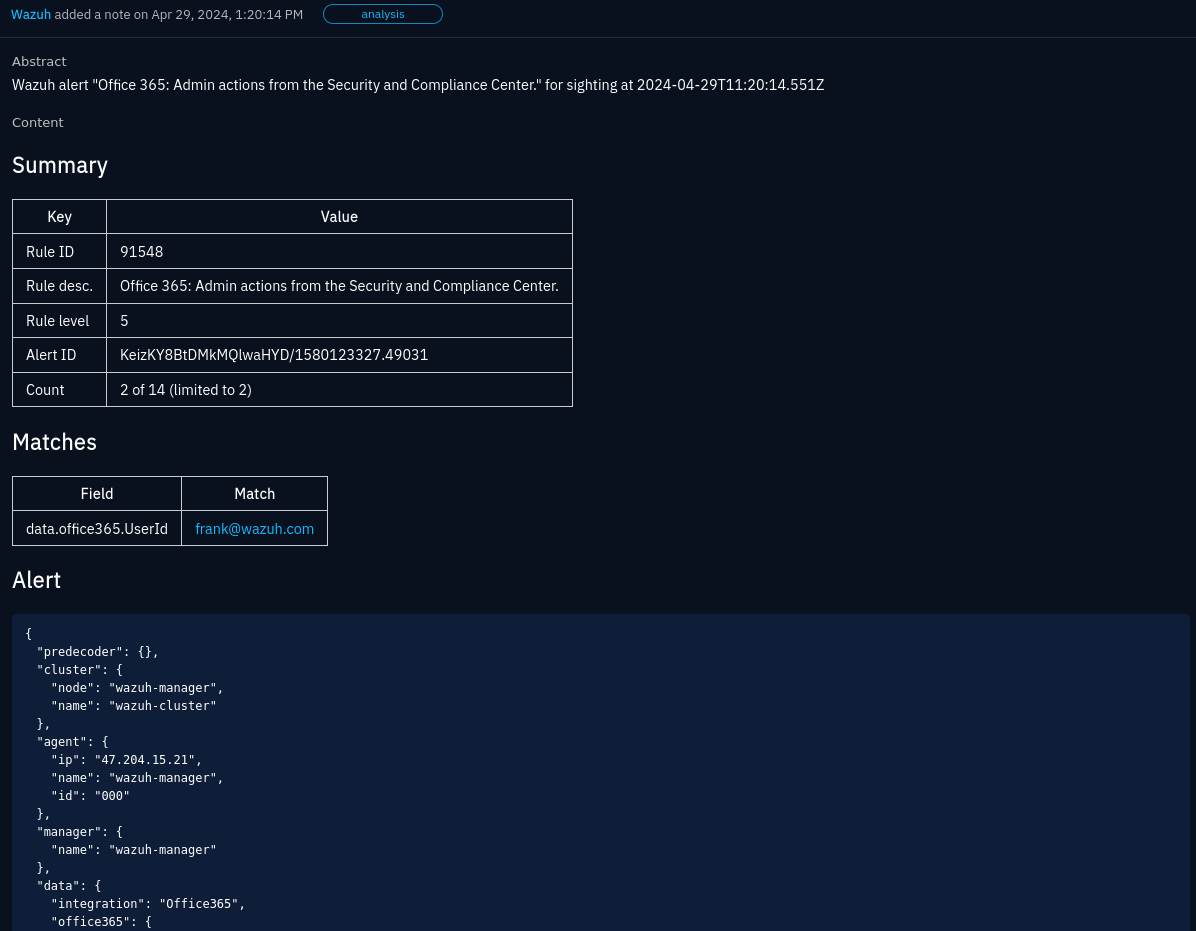
Alert note for an Office 365 admin action event where the User Account observable was found in the UserId field.
The alert note gives you a summary about the alert, along with the whole alert as JSON. A table provides a simple overview of where the observable matched in the alert. This is not how matching works when searching for alerts. It’s just a simple substring match in the result for convenience. It may be empty if this simple approach does not return any results.
In addition to notes, a link in form of an external reference is also attached to the observable and sightings. The link will take you to to the alert in Wazuh. How many links to create are controlled by settings very similar to those for alerts.
Incidents and alerting
A sighting just tells you that an observable is found in Wazuh, when and how often. It does not necessarily indicate anything malicious. However, if that observable is part of an indicator, an incident may be created as well. See require indicator for an overview of which settings determine when an incident should be created.
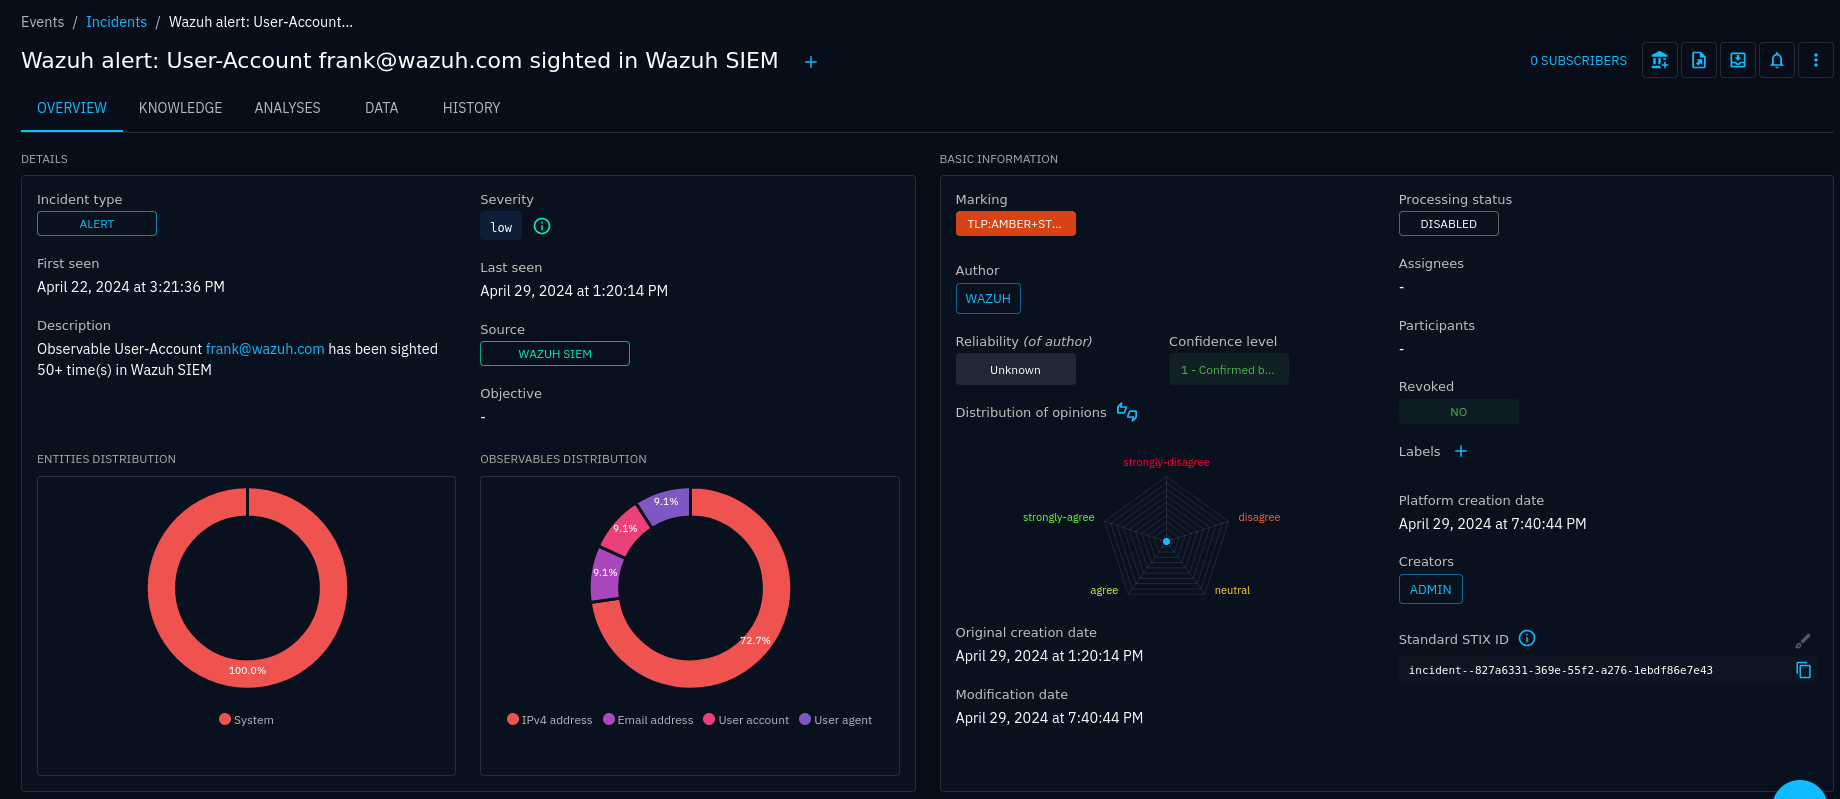
Incident view
When the connector creates an incident, it will include a lot of entities that
are related to the matched alerts. These are extracted in the connector stage
called enrichment (not to be confused with the OpenCTI
enrichment, which is the action that runs the connector in the first place).
The relevance of these entities may vary a lot, but they are all preset in the
alerts that caused the incidents. You may configure which kind of entities to
include by changing enrich.types.
In lack of more suitable standards-compatible relationship types, most relationships are simply “related-to”.
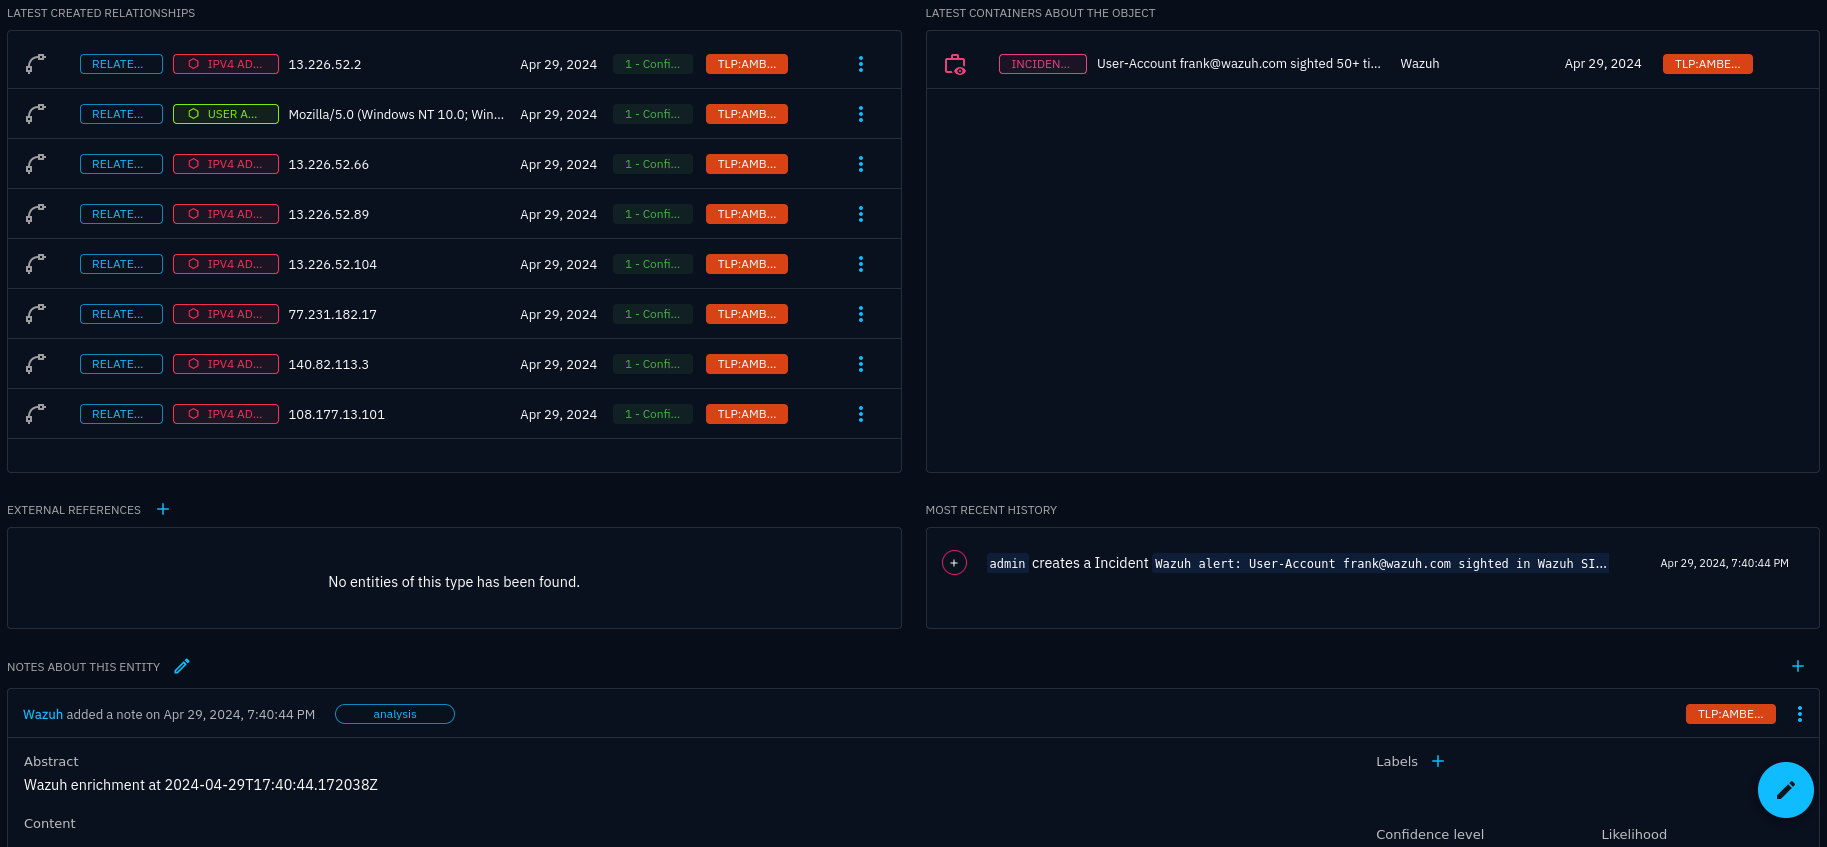
Incident view (continued)
Alerting
Just as you would set up some form of notification, like e-mail or Slack, for high-level alerts in Wazuh, you probably want to be notified when incidents are created in OpenCTI. OpenCTI offers a powerful trigger system where you can create triggers on creation/modification/deletion of any kind of entity, with optional filters. You can also create triggers on specific objects.
Triggers are typically created individually, but you may also create and apply them for groups or organisations as an administrator.
See the OpenCTI documentation on notifications for details. Below is an example of creating a trigger on incidents and (incident response) cases:
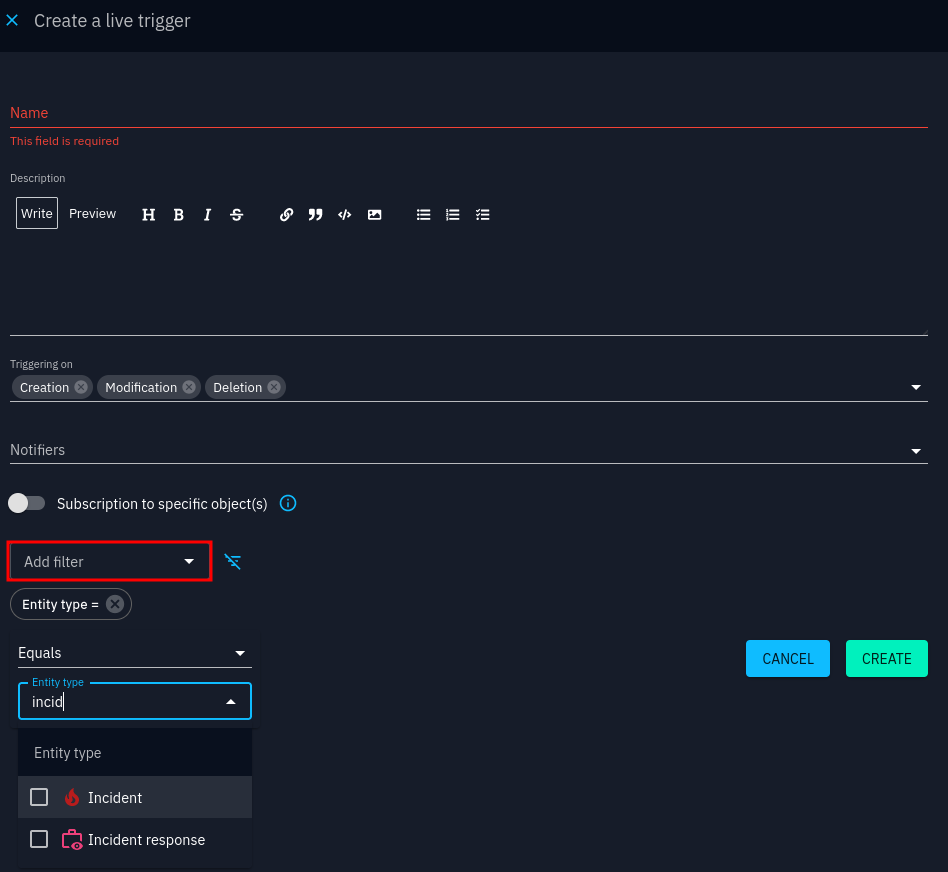
Trigger interface
By default, only e-mail is available as a notifier. See the OpenCTI administration documentation for how to configure notifiers.
Case management
Incident response cases are one of several cases in OpenCTI. Cases are an extension to STIX that brings case management to OpenCTI.
Before using case management, be sure to configure status templates and workflows in your OpenCTI installation, as well as case templates. Otherwise, cases and tasks will not be very useful. You may set these up after having created incidents/cases and then use statuses and workflows.
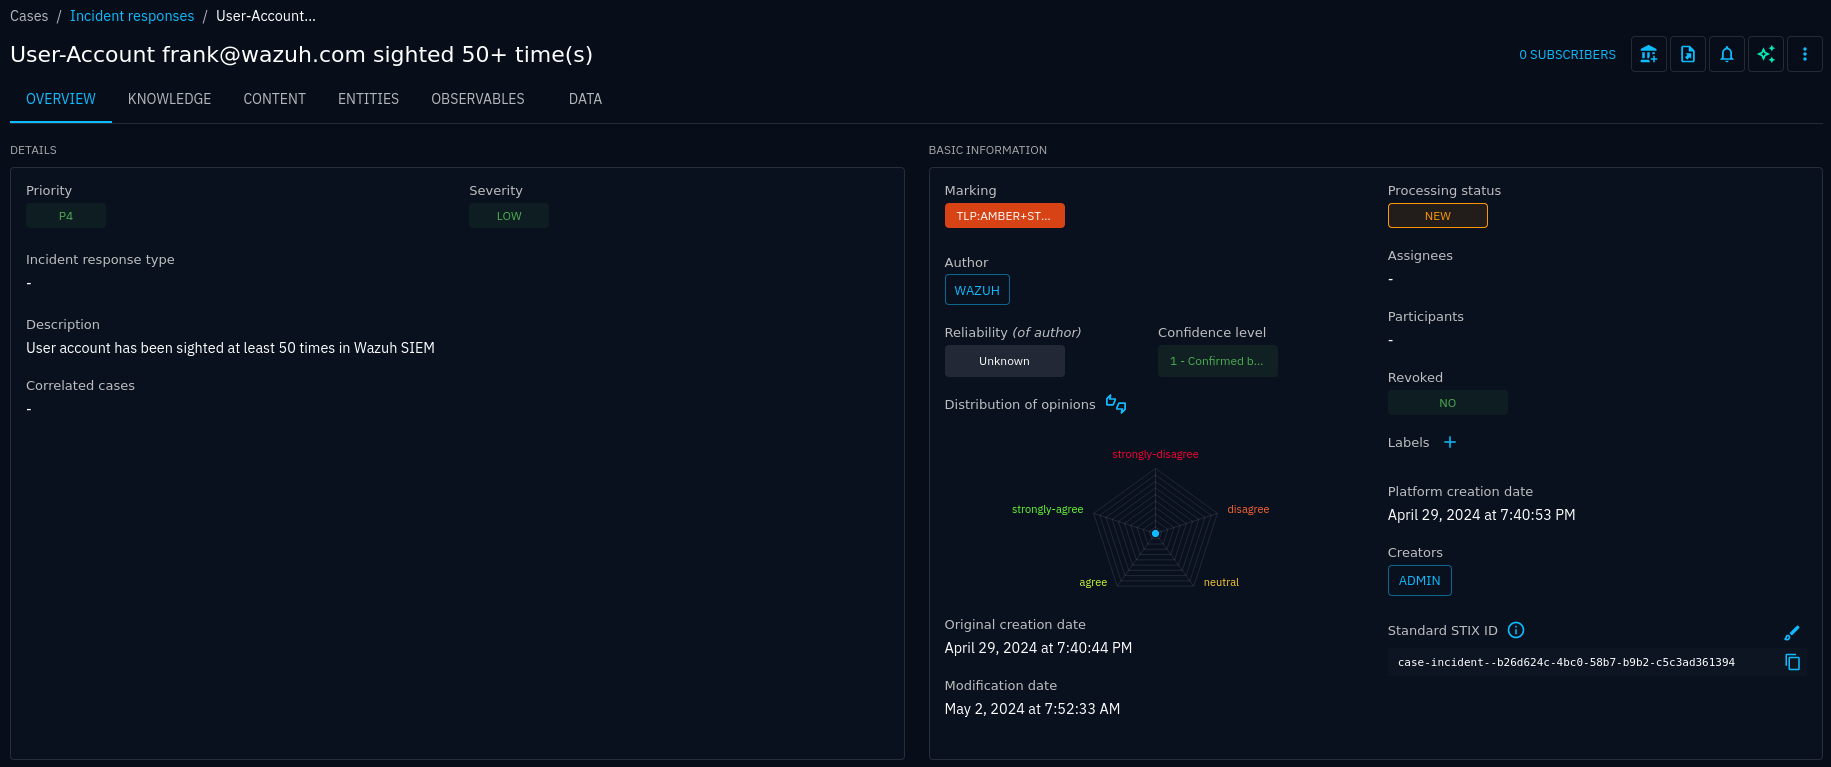
A new incident response case without any status, assignees, participants or tasks
Unless you have configured workflows, your case will have processing set to Disabled. Otherwise, you would have a status label like New. Your next steps would typically be to assign an investigator, possibly assign other participants, and create a set of default tasks from a case template.
Using a case template is done by clicking on the Apply a new case template button in the tasks section:

Applying case template to a new case
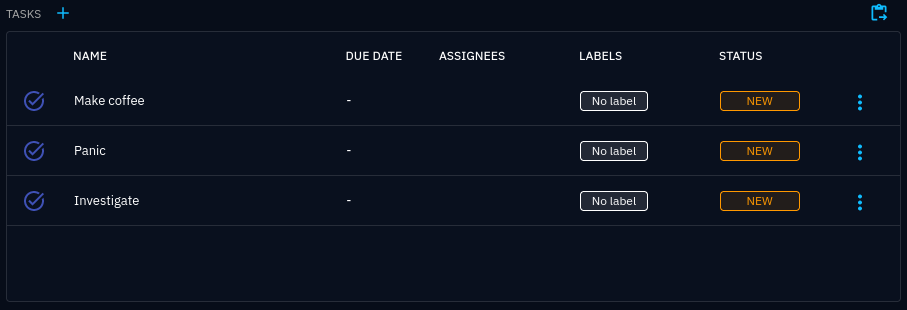
Tasks created by applying a case template
Investigations
Investigations turn the knowledge graph view of a case into an interactive editor where you can pivot on entities, show and hide relationships and other entities. You may also manually add new entities and create new relationships. Using the case as a starting point saves you a lot of work compared to starting an investigation from scratch. Press the Start an investigaton button in the upper-right corner:
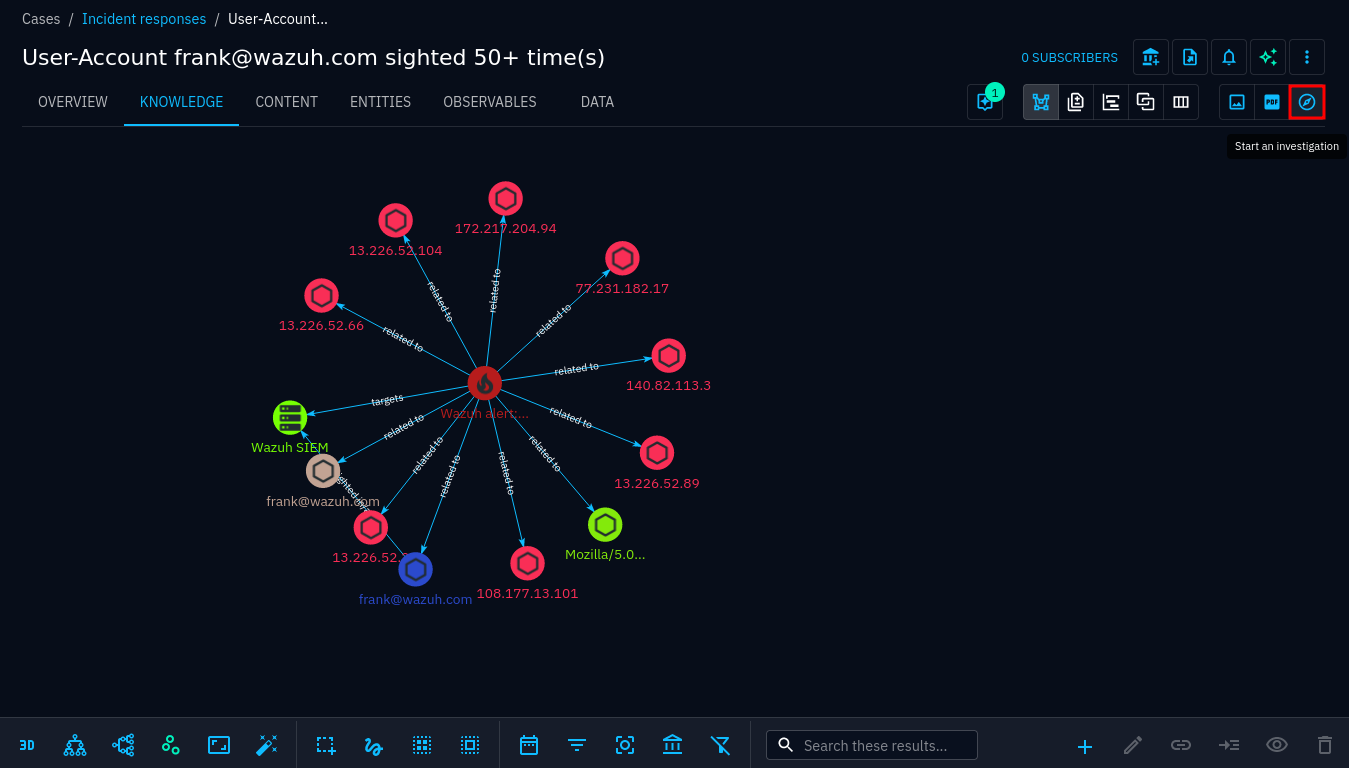
Start an investigation from a case
The resulting investgation is yours only, completely private unless you explicitly share it with team members.
Clicking on entities gives you information about the selected entity, and likewise for relationships. Double-clicking on an entity brings up an interface for expanding elements:
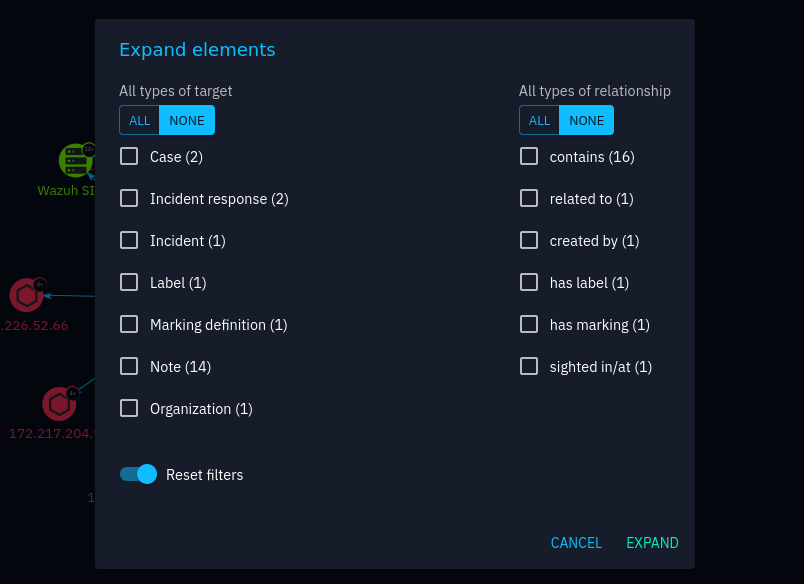
Expand nested entities, relationships and related entities
When you have a knowledge graph that you would like to use in a report, you can create a report from your investigation by click on the Add to a container button:

Examples
TODO: Concrete example from IoC to report
